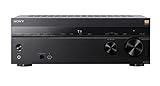
This short introduction explains what you will see and do from the unit’s home screen through the full update flow. Start at the home menu, open Setup and then System Settings to find the Software Update item. You can choose update via the Internet or via a USB memory device.
We cover when an update makes sense and what benefits the latest software brings, such as improved stability and feature fixes. The guide also shows how to check the current version before you begin.
Follow clear, step-by-step directions and watch the on-screen and front-panel display messages while the process runs. Keep power steady and leave the unit idle until it restarts automatically. These safety steps prevent corruption and ensure a smooth finish.
Before You Begin: Requirements, Preparation, and Version Checks
Before starting, confirm key items so the process runs without interruption.
Confirm current version: From the home menu, open Setup > System Settings > Software Update and note the displayed software version. Compare that number with the release notes on the customer support page if you need the latest software.
Choose a method: Decide on a stable Internet connection or a USB flash drive. If using USB, download the package from the official support page and store the file exactly as instructed so the unit’s display panel can find it.
- Verify continuous power and clear view of the front display panel.
- Prepare a formatted USB drive with enough space and the correct filename.
- Have network credentials ready if connecting via Ethernet or Wi‑Fi.
- Close playback, disconnect extras, and ensure ventilation during the process.
| Item | Internet | USB |
|---|---|---|
| Source | Official online server | Support page download |
| Prep | Network stable, password ready | Formatted drive, correct filename |
| Display | On-screen progress messages | Display panel reads package |

How To Update Your Sony Receiver Firmware
Begin at the home screen and pick the path that matches your setup: a network download or a prepared USB drive. Both procedures use the same menu chain and show clear progress on the display panel.
Update via Internet using the home menu
From Home, open Setup > System Settings > Software Update. Select Update via Internet and follow prompts. The receiver connects to the support server, downloads the package, and applies the software version.
Update via USB using the display panel and AMP MENU
Copy the latest file from the official support page onto a formatted USB drive. In the on-screen path choose Update via USB Memory inside Software Update. Or use the front panel: insert the USB into the POWER SUPPLY USB port on the rear, press AMP MENU, go to <SYSTEM> > UPDATE, and select START.

Progress indicators and restart
During the process the display may flash READING, then show UPDT xxx percentages. UPDATING can blink or briefly disappear; this is normal. When the message COMPLETE appears the unit performs an automatic restart and the new version becomes active.
- Keep the front display panel visible while the transfer runs.
- Do not turn receiver off until the unit restarts after COMPLETE.
- Verify the installed version in the same home path and compare with the support page if needed.
Troubleshooting, Timing, and Safety Notes During Updating Software
Allow the process to run without interruption and watch the front display for status cues.
The typical network install needs about an hour, while a USB transfer normally finishes in roughly 15 minutes. During either path the center display panel will show messages such as READING, UPDT xxx, and UPDATING.
When the message COMPLETE appears the unit will restart automatically and the update completed state is reached. Do not press buttons or switch inputs while the process runs.
- Never turn the receiver off mid-install; cutting power during writing can cause a malfunction requiring service.
- If the front panel seems stuck, wait longer—network downloads and verification may extend past an hour.
- For USB, reseat the drive if not detected and confirm the file came from the official support source so the display recognizes it.
- Rollback is not available after installation; verify the file and release notes before starting.
Conclusion
, This final note wraps the process and highlights the signals to watch on the front display panel.
After you see messages such as READING, UPDT xxx, or UPDATING, wait for COMPLETE and the automatic restart. That sequence means the update completed successfully and no further action is needed.
Keep this page handy for the exact menu path and indicator text. Repeat the preparation checklist before future installs so power, media, and files are verified.
With these steps you can handle maintenance with confidence. Let the unit finish, then check settings after the system returns to normal.
FAQ
How can I check the current software version from the home menu?
Open the home menu, go to Setup or System Settings, then select Version or Software Information. The display panel will show the installed version on the screen so you can confirm whether the latest release is needed.
What do I need before starting an internet update from the home menu?
Ensure a stable internet connection, the receiver is connected to your network, and you have access to the Sony customer support page if you need the latest release notes. Keep the remote and display panel accessible throughout the process.
What are the requirements for a USB update using the display panel?
Download the correct update file from Sony’s support page onto a FAT32-formatted USB flash drive. Insert the drive into the receiver’s USB port, then use the AMP MENU or Software Update option on the display panel to start installation.
Where do I download the latest software version?
Visit Sony’s official customer support website, enter your model number, and download the firmware file shown on the product’s support page. Follow the provided instructions and transfer the file to a USB drive if required.
How do I navigate to the software update option on the receiver?
From Home, select Setup, then System Settings, and choose Software Update. From there you can select Update via Network or Update via USB depending on your method.
What on-screen messages should I expect during installation?
Look for messages like UPDATING, READING, UPDT xxx (version number), and COMPLETE. These indicate progress stages; the display panel will usually show status and any prompts.
Will the receiver restart automatically after the update is completed?
Yes. Most models perform an automatic restart when the update is completed. Do not power off the unit while it restarts or during any update stage.
How long does the process usually take via network and USB?
Network updates can take about an hour, depending on connection speed and file size. USB updates are often faster, typically around 15 minutes. Times vary by model and software size.
What happens if the receiver loses power mid-update?
Power loss during installation can corrupt the system. Because rollback isn’t available on many units, a failed update may require service from an authorized Sony center. It’s critical not to turn the receiver off until the update completes.
Can I update without internet access?
Yes. Use a USB flash drive with the downloaded software from Sony’s support page. Follow the USB update steps in the AMP MENU or Software Update screen on the display panel.
How do I confirm the latest software installed after the process?
After the restart, return to Home > Setup > System Settings > Version or Software Information. The display will show the current version so you can verify the update succeeded.
What should I do if the update displays an error?
Note the error code or message, then check Sony’s support page for that specific code. Try re-downloading the file, use a different USB drive, or connect via a more stable network. If issues persist, contact Sony customer support.
Is it safe to use the receiver during an update?
No. Avoid using inputs, changing settings, or powering down the receiver during the update. Interruption can cause incomplete installation or system errors.
Are update files model-specific?
Yes. Always download the file that matches your exact model number from the support page. Installing an incorrect file can cause malfunction and may void warranty coverage.


