Quick fixes for sound-without-visuals start with simple checks. Confirm the TV input matches the source and verify receiver input mapping. Reseat the hdmi cable and try a different port to rule out a faulty connector.
Power cycle the set-top box, receiver, and display. That often clears an hdmi handshake error that blocks video while sound plays. If the box shows the same issue when connected directly to the screen, focus on provider service or the source device.
For lasting fixes, check receiver input assignments and pass-through settings. Test each source and swap cables if needed. These steps help any user restore both picture and sound in minutes.
Understand the symptoms and user intent right now
First, identify the visual symptom — black screen, brief flicker, or an on‑screen message. Note whether the display shows an input label so you know which port is active.
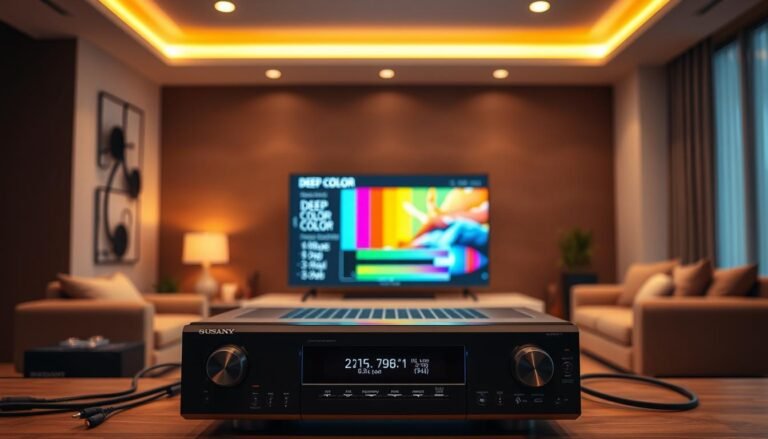
Check if you have sound through the receiver speakers. Sound-only often means the receiver accepts audio but fails to pass video, suggesting an HDMI handshake or HDCP conflict.
Confirm the active source and test other inputs or devices. If one box shows no picture while others work, the problem likely lies with that source, its cable, or its settings.
Try bypassing the receiver by connecting the source directly to the screen. If picture returns, the fault points to the receiver pass-through, an HDMI cable, or EDID negotiation.
Also observe whether the TV briefly shows a resolution banner when switching inputs. No banner can mean the input sees no signal. Track recent moves, cable swaps, or firmware updates that might have triggered this issue.
Goal: keep the receiver as your central hub while restoring reliable video with minimal changes.
Quick checks: select the correct TV input/source
Start by using the TV remote’s Input or Source button to locate the right HDMI input. Aim the remote at the display and press the button to cycle through hdmi inputs. Pause on each entry so the screen can detect a signal and show the picture if present.
Use the Input or Source button on the TV remote
Press the input button slowly and give the display time to lock on. Many sets switch automatically after a few seconds. If the remote control doesn’t respond, try the TV’s side or rear input button.
Match the on‑screen label to the physical port
Match the on‑screen HDMI label (for example, HDMI 1 or HDMI 2) to the actual port where the receiver’s HDMI Out is plugged in. If you moved cables recently, double‑check the label beside the port so the selected input truly matches the connected cable.
- Tip: Slowly cycle each HDMI input and pause to let the box or source negotiate video.
- If one input shows picture while others do not, use that input and consider renaming it in settings for future ease.
- If you hear sound from the receiver but still lack picture, proceed to verify receiver input selection next.
Verify AV receiver input selection and source assignment
Start by confirming the receiver’s active source using the front-panel labels or the remote control. The unit’s display or front panel indicator shows the current input. If that label does not match the port where your device is plugged in, the receiver may pass sound but block the picture.
Select inputs from the receiver front panel or remote
Press the labeled input button on the front panel or use the remote to pick the correct source. The display should update to show the chosen input and confirm the receiver sees the device.
Navigate the menu with Setup, Home, arrows, Enter, and Return
Open the Setup or Home menu to check HDMI assignments. Use arrow keys to move to input settings, press Enter to select, and Return to exit back to normal playback.
- Confirm the assigned HDMI input matches the physical port holding the cable or cable receiver.
- If one input shows picture and another does not, reassign the source to a known-good HDMI port in input mapping.
- Check any video direct or pass-through option per input so the receiver sends the video unchanged to the screen.
Save changes in setup so the correct selection persists after power cycles. Watch for on-screen or front panel HDMI lock indicators; losing that lock can point to handshake problems further down the chain.
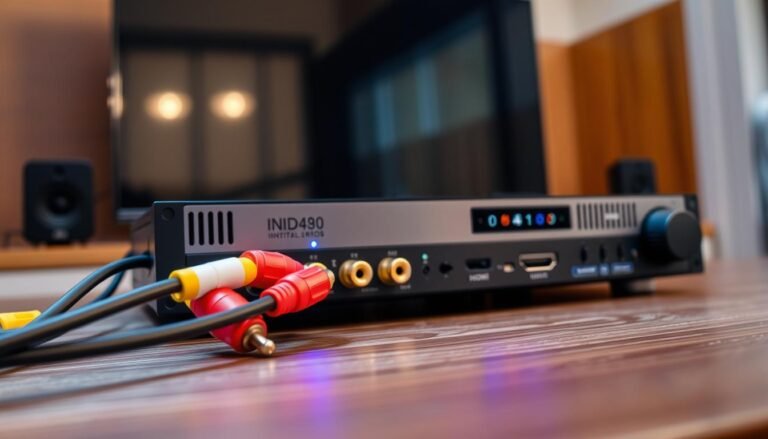
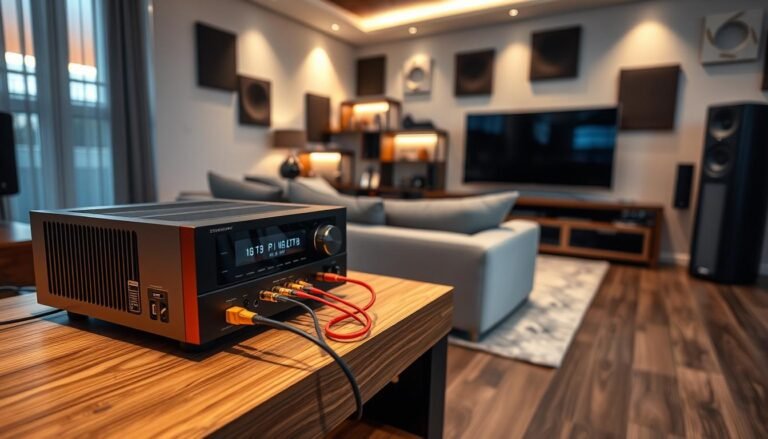
Inspect HDMI and video cabling for secure, damage‑free connections
Turn off the display, box, and receiver, then only reseat cables once power is removed. This avoids hot‑plug glitches and helps the equipment establish a clean handshake.
Confirm the correct cable path
Verify the HDMI run: the display must connect to the receiver’s HDMI Out, and the source should plug into one of the receiver’s HDMI In ports.
Look for physical damage and fit
Push each plug fully into its port until it sits snug. A loose plug can pass sound while failing to pass stable picture.
- Inspect connectors for bent shells, cracked strain relief, or loose shielding.
- Try a known‑good high‑speed HDMI cable, and use a shorter run for high‑bandwidth 4K/HDR setups.
- For wall runs, check the plate connectors and any in‑line adapters.
| Issue | What to check | Fix |
|---|---|---|
| Loose port | Wiggle HDMI at both ends; inspect port fit | Reseat cable or move to another port |
| Damaged cable | Bent shell, exposed wires, cracked relief | Replace with known‑good high‑speed cable |
| Long run/signal loss | Excessive length or low quality | Use shorter cable or active/boosted line |
| Legacy component use | Component video carries lower quality | Switch to HDMI and pick correct input |
After reseating, power on the display first, then the receiver, then the source. This order helps EDID and HDCP negotiation finish cleanly so picture and sound restore together.
Why is my receiver not sending a picture to the TV?
Confirm the active HDMI port on the screen matches the port used by your source device. An input mismatch is the simplest and most frequent cause. If the screen and receiver show different inputs, sound can play while the picture stays dark.

Loose or damaged cable connections often let audio pass but fail to carry stable video. Reseat plugs and try a known-good cord.
- Handshake and HDCP problems: EDID or copy-protection conflicts can stop the receiver from passing a lawful signal the display accepts.
- Compatibility gaps: Older displays combined with newer receivers can cause black screens or flicker.
- Resolution or color-format mismatch: The receiver may output a mode the screen cannot render.
| Cause | What to check | Quick fix |
|---|---|---|
| Input mismatch | Screen and receiver labels | Select matching input |
| Cable/connection | HDMI plug fit and damage | Reseat or replace cable |
| Handshake/HDCP | Active source negotiation | Power cycle devices; try other input |
HDMI handshake, EDID, and HDCP copy protection conflicts
A common sign of handshake trouble is a receiver HDMI indicator that drops when a specific display is connected. This often points to an EDID or HDCP mismatch rather than a bad source or cable.
Recognize the symptoms: a stable picture on a modern TV but a black screen on a projector via the same receiver signals negotiation differences. Sound may continue while video fails, or the receiver’s HDMI light may disappear.
Try different inputs, cables, and power order
- Swap the HDMI input on the receiver to rule out a port quirk.
- Use a shorter, certified high‑speed cable for projector runs to improve signal integrity.
- Power on in this order: display first, then receiver, then source so EDID and HDCP can negotiate cleanly.
Test with TV versus projector to isolate compatibility
Connect the box directly to the projector. If it works, the conflict sits between the receiver and the display. Connect the receiver to a modern TV; if that locks, the receiver can pass video but trips on that projector’s EDID or HDCP handling.
| Symptom | Likely cause | Quick action |
|---|---|---|
| Receiver HDMI light drops | HDCP/EDID fail | Bypass, change input, power cycle |
| Works direct to display | Receiver–display compatibility | Try EDID manager or HDMI repeater |
| Only works on modern TV | Legacy display limits | Lower output resolution; set pass-through/native |
Source device specifics: cable box, streaming box, and game console checks
Start by rebooting the source box and the hub, then check HDMI contacts at both ends. Power down the set-top, console, or streaming unit and then power down the receiver. Wait 30 seconds unplugged before reconnecting.
Reseat HDMI plugs firmly at both device and receiver ends. A loose plug can pass sound while failing to pass stable picture.
- Fully power off box, then receiver; unplug HDMI, wait 30 seconds, reseat, then power on.
- Consoles: check resolution, HDR, and VRR settings so output matches receiver and display capabilities.
- Streaming boxes: toggle match frame rate or dynamic range if blank screens occur when modes switch.
- If box shows menus but no channels, contact your provider for a refresh or provisioning check of service.
- Try a different HDMI port on the receiver and swap to a known-good cable briefly to rule out marginal connections.
| Source | Quick check | Action |
|---|---|---|
| Cable box | Menus visible, channels dark | Request provider refresh; reboot box |
| Streaming box | Blank on mode change | Toggle dynamic range/match frame rate |
| Game console | No picture after update | Lower resolution/HDR off; update firmware |
If you’re pretty sure the source worked direct to display, the negotiation may fail at the receiver. Update device firmware and test direct connection for isolation.
Receiver video settings that impact picture output
Start at the on‑screen setup and check any HDMI audio out and pass‑through toggles. These options often decide whether the receiver will pass clean video through or alter output format.
Review HDMI audio out, pass‑through, scaling, and resolution
Open the receiver menu and locate HDMI Audio Out. Set this so audio routing does not block video pass‑through.
- Turn off unnecessary scaling; choose pass‑through or a known resolution like 1080p to get video quickly.
- If standby pass‑through is available, enable it so the display sees a signal when the box sleeps.
- Check enhanced format toggles (4K/8K/HDR) and match them to your cable and TV limits.
Confirm input mapping and port/output selection
Make sure the receiver input assignment matches the physical HDMI port where the source is plugged in. Use the front panel or on‑screen status to confirm signal lock and format.
| Setting | Menu location | Quick action |
|---|---|---|
| HDMI Audio Out | Setup > Audio | Set to receiver or passthrough per system |
| Video Scaling / Output | Setup > Video | Disable scaling; set 1080p or native |
| Input Mapping / Monitor Out | Setup > Inputs | Match input to physical port; select correct monitor out |
Save changes, test multiple sources, and revert one change at a time if picture still fails. This isolates the problematic setting without losing a working configuration.
TV and projector display settings that can block video
Use the projector or TV on‑screen menu to check supported formats on each HDMI port. Many displays let you select standard or enhanced mode per input. If the mode exceeds the display’s limits, the screen can stay dark even while sound plays through the receiver.
Check input mapping and HDCP options. Confirm the selected input matches the receiver’s HDMI Out. Look for HDCP toggles and input customizations that must match the source and receiver requirements.
- Set the receiver or box to 1080p temporarily to confirm the image.
- Try different HDMI port on the display to bypass a port limit or fault.
- Force color subsampling (4:2:0 or 4:2:2) if 4:4:4 fails on some projectors.
- Reopen the home menu and reselect the HDMI input to reinitialize the handshake.
| Issue | What to check in menu | Quick fix |
|---|---|---|
| Port limited to standard | Input format per port | Switch to enhanced or move to enhanced port |
| HDCP mismatch | HDCP/DRM option or input lock | Match HDCP version or set source lower |
| Color format unsupported | Color subsampling and bit-depth | Force 4:2:0/4:2:2 or lower bit-depth |
When you have sound but no picture through the receiver
Start by rebooting the box, then the receiver, to force fresh negotiation of the HDMI link. A short power cycle often clears HDCP and EDID conflicts that let sound pass while blocking video.

Reseat HDMI cables at both ends and try a different HDMI input on the receiver. Some jacks pass audio but fail at higher video rates.
- If menus show but channels remain dark, contact your provider for re‑provisioning or to check service status.
- Swap in a known‑good HDMI cable; failing cables may carry sound but drop negotiated video.
- Test the box direct to the display. If picture appears, the issue lies in the receiver HDMI path or compatibility settings.
- Temporarily set the box output to 1080p/1080i to re-establish video through the receiver.
After picture returns, label the cable and input so future moves don’t break the chain. Keep box firmware current and note any error codes before calling support.
| Symptom | Likely cause | Recommended action |
|---|---|---|
| Sound only, black screen | HDCP/EDID or pass‑through fail | Power cycle, reseat HDMI, try other input |
| Menus visible, channels dark | Service provisioning or box issue | Call provider for re‑provision or refresh |
| Works direct to display | Receiver compatibility or bad cable | Swap cable; test receiver HDMI settings |
“It worked fine yesterday”: everything else seems fine, what changed?
A setup that worked fine yesterday can break after an overnight update, tweak, or cable move.
Start by thinking about changes. Firmware updates, HDMI‑CEC commands, and minor cable nudges often shift input selection or handshake behavior overnight.
Quick checks:
- Turn off HDMI‑CEC on both devices, then power cycle the display, receiver, and box in that order.
- Review recent auto‑update logs on each device and undo any new video or HDR defaults.
- Reseat the HDMI cable and try a different input; a slightly loosened plug can carry sound while dropping video.
Recreate the sequence you used yesterday. Many systems lock a stable handshake when powered on in the same order. If an app or console updated, set output to safe 1080p, confirm video, then step up formats one at a time.
| Change | Likely effect | Recovery step |
|---|---|---|
| Auto firmware update | New default resolution or handshake | Check update log; lower output to 1080p |
| HDMI‑CEC command | Wrong input or power order | Disable CEC; power cycle in correct order |
| Cable move or tidy | Loose contact, audio only | Reseat cable; test different HDMI port |
Try alternative connections to isolate the problem
A quick bypass test often tells you whether the issue lives in the chain or in the display itself. Start by connecting the source directly to the screen with HDMI. If the picture returns, the receiver path or its HDMI pass-through likely blocks video.
If direct HDMI also fails, try another input on the display or hook the box to a second screen. This rules out a bad display port.
Bypass test: connect source directly to the TV to confirm video
Swap only one cable at a time so you can track which change fixes the issue. If you have one HDMI cable, alternate it between source, receiver, and display to find the faulty link.
Component video vs HDMI: quality differences and temporary workarounds
When HDMI through the receiver fails, component video can keep playback going in a home theater. Note: component video offers lower quality and no HDR, so use it as a short-term fix.
- Test with a short HDMI run near the receiver to isolate long-run signal loss.
- If bypassing works for all boxes, consider an EDID manager or a different receiver HDMI output.
- Document the working resolution and color settings, then mirror them when reconnecting through the receiver.
| Test | Action | Result |
|---|---|---|
| Direct HDMI | Source → screen | Isolates receiver path |
| Single cable swap | Alternate one cable | Finds bad cable link |
| Short run test | Use short HDMI near hub | Detects length-related loss |
After you identify the faulty segment, restore the normal chain and retest each input. Label cables and note successful settings to speed future troubleshooting.
Reset options to restore video
A brief full‑power cycle often clears handshake caches; remove power for 30–60 seconds and then reboot devices in order.
Start with the display, then the receiver, then the box when powering back on. This order helps EDID and HDCP negotiation complete cleanly.
Soft reset, per‑input reset, and full factory reset
Try a soft reset first: power off all gear, unplug for 30–60 seconds, then power on display, receiver, and box in sequence. This often clears transient handshake errors.
- Input reset: If the model allows, restore defaults for only the affected input. This avoids wiping speaker setups and saved names.
- Factory reset: When nothing else works, perform a full reset receiver routine and rerun setup to clear corrupt HDMI state or misconfigurations.
- After any reset, select the intended input and set output to 1080p to confirm stable pass‑through before re‑enabling advanced features.
- Disable HDMI‑CEC while testing to reduce variables; reapply customizations gradually once the link stays stable.
| Action | When to use | Quick tip |
|---|---|---|
| Soft reset | First step | Unplug 30–60s; restart in order |
| Input reset | Only affected port | Preserves other settings |
| Factory reset receiver | Last resort | Note reset codes; back up settings if possible |
After resets, recheck cabling and ports. If a reset receiver process restores video but it fails again, suspect a failing cable or port. Contact support with your test steps if the full reset does not recover the signal.
Update firmware on receiver, TV/projector, and source devices
Look for firmware patches that mention HDCP, EDID, or HDMI pass-through fixes. These updates often resolve handshake problems that let sound play but block video.
Start with the receiver. Check the support menu or the maker’s app for firmware notes that list HDMI, EDID, or HDCP improvements. Apply updates before making deeper changes.
Next, update the display’s software so it better recognizes newer signals. Then check the box, console, or streaming device and install any available system updates.
- Power cycle all gear after updates: display first, then receiver, then source.
- Use USB or manufacturer apps when network updates are unreliable.
- Record firmware versions and the update date for future troubleshooting.
- If an update causes new issues, roll back if supported or set output to a safe baseline like 1080p and recheck settings.
| Component | Why update | Quick action |
|---|---|---|
| Receiver | Fixes HDMI pass‑through and EDID negotiation | Check support menu or app; install firmware; reboot |
| Display (TV/projector) | Improves handshake with modern receivers | Run software update; verify input mode |
| Source box / console | Adds compatibility for HDCP and output formats | Install system update; set safe resolution |
| Network check | Prevents partial downloads that corrupt updates | Ensure stable internet or use USB method |
After updating, revisit receiver input mapping and HDMI settings. Reseat the cable and test the input path. If sound returns but video still fails, reinitialize the handshake by swapping inputs or trying a direct connection for isolation.
When to contact support or a home theater service
If your own checks—input selection, cable reseat, port swaps, and bypass tests—haven’t restored video, prepare details before you call support.
What to have ready
- Models and firmware: list the display, receiver, and box model numbers and firmware versions.
- Ports and cables tried: note which HDMI ports you used, lengths, and whether any active extenders or adapters were in the chain.
- What the screen showed: exact on‑screen messages (no signal, HDCP error, black) and whether sound played through the receiver.
- Tests performed: say if direct connection to the display restored video, and which source devices (box, streamer, console) you tested.
- Menu actions and status icons: list any receiver setup steps, button presses, and whether the receiver see HDMI lock or status icons.
How support or a home service will use this
Technicians move faster when they can reproduce the problem from your notes. Clear data cuts troubleshooting time and helps them recommend EDID tools, firmware steps, or a site visit.
| When to call | What to provide | What they may do |
|---|---|---|
| All inputs tested, still no video | Ports, cables, firmware, on‑screen errors | Remote diagnostics; firmware or EDID guidance |
| Works direct to display but not via receiver | Bypass result, tested cable list | Suggest EDID manager or test with known‑good gear |
| Intermittent lock or specific port fails | Which port fails, power‑on order tried | Port replacement or in‑home cable and display test |
If you schedule home service, ask the technician to bring known‑good cables and a portable display. Share a simple diagram of your connection path so the first visit fixes the issue fast.
Conclusion
Key takeaway: Conclude with one last, focused pass: check the HDMI port, then swap the cable and test the box directly to isolate the source.
If video returns on direct connection, the problem sits in the connection chain. Check sound and output settings, then try one hdmi output on the receiver and a soft reset if needed.
Document which port and cable fixed the issue. If everything else seems fine but the fault persists, update firmware and gather details before calling service. For most home theater setups, this method helps you get video back fast without replacing gear.
FAQ
Why isn’t the receiver sending a picture to the TV?
Common causes include the wrong TV input selected, a loose or damaged HDMI cable, or an HDMI handshake/HDCP conflict. Verify the TV input matches the receiver HDMI output, reseat cables with power off, and try a known-good high-speed HDMI cable.
How do I confirm the TV is on the correct input or source?
Use the TV remote’s Input or Source button to cycle HDMI inputs. Match the on-screen label (HDMI 1, HDMI 2) to the physical port you used. If labels are unclear, try each HDMI input until the receiver’s menu or video appears.
How can I check the receiver’s input selection and source assignment?
Select the input from the receiver front panel or remote. Open the receiver menu with Setup or Home and use arrows, Enter, and Return to confirm that the mapped input corresponds to the HDMI port the source uses.
What should I inspect on HDMI and video cables?
Power everything off, then reseat cables. Confirm TV ↔ receiver uses the receiver’s HDMI OUT and the receiver ↔ source uses HDMI IN. Look for bent pins, frayed jackets, or loose plugs and test with a different high-speed HDMI cable.
What are HDMI handshake, EDID, and HDCP issues and how do I spot them?
Handshake problems show as no video, black screen, or intermittent flicker while audio may still work. Try different HDMI inputs, a shorter cable, or change the power-on order: TV first, then receiver, then source. Testing with a TV vs. projector helps isolate HDCP compatibility.
How do I troubleshoot a cable box, streaming box, or game console?
Power cycle the source and receiver, reseat HDMI at both ends, and test the source directly into the TV to confirm video. If using a cable box, check provider status or re-provisioning requirements with the provider.
Which receiver video settings can stop video output?
Incorrect HDMI audio out, pass-through, scaling, resolution, or input mapping can block picture. Verify the receiver’s output resolution matches the TV’s supported modes and ensure the selected receiver input maps to the active HDMI port.
Could TV or projector settings block the image?
Yes. Check the display’s input source, supported resolutions, and any HDCP options in the menu. Some displays have power-saving or HDMI deep-sleep modes that interfere with handshakes; disable those for testing.
Why do I get sound through the receiver but no picture?
That suggests an HDCP or handshake problem, or the receiver is passing audio but not video due to a video setting or a crippled link. Try bypassing the receiver (source → TV) to test video and then reintroduce the receiver.
It worked yesterday — what likely changed?
Recent firmware updates, HDMI-CEC behavior, or a setting change can break a previously working setup. Think about recent updates, reconnects, or new gear and revert any recent changes for testing.
How can I isolate the fault with alternative connections?
Perform a bypass test by connecting the source directly to the TV. If that works, the receiver or its HDMI ports are at fault. You can also try component video as a temporary workaround, though quality and features like HDCP will differ.
When should I reset the receiver and what types of reset help?
Start with a soft reset (power cycle). If issues persist, try an input reset or the receiver’s factory reset. Keep notes of custom settings before a factory reset so you can restore them afterward.
Does firmware affect HDMI compatibility and how do I update?
Yes. Update firmware on the receiver, TV/projector, and source devices to fix handshake problems. Check each manufacturer’s support site or the device’s setup menu for update instructions and follow the recommended sequence.
When should I contact support or a home theater service?
Contact support if you’ve tried different cables, inputs, power cycles, firmware updates, and bypass tests without success. Provide details: ports used, cables tried, sources tested, and any on-screen messages to speed troubleshooting.
What diagnostic info should I collect before calling support?
Note which HDMI ports you used, model numbers of TV/receiver/source, firmware versions, behavior (audio only, flashing, black screen), and steps already tried. This helps service technicians reproduce and resolve the issue faster.