This quick guide points you to the most common causes for weak low end and clear, repeatable fixes.
Start with power, hookups, and basic settings so you rule out simple faults fast. Then move to placement and room interaction, since standing waves and seating position can hide entire notes at the listening seat.
We explain how a subwoofer works with your mains and the room to shape frequency response, and when you should expect real deep bass versus what content actually contains. You’ll learn simple tests and listening-led adjustments plus why standards like CTA-2010 matter for clean output.
Understand the problem: symptoms, expectations, and the low-end “picture”
Build a simple mental picture of what you should hear and feel. A clear image helps separate a setup fault from content limits. Listen for punch, fullness, and tactile rumble to map issues quickly.
What “too low” vs “non-existent” actually sounds like
“Too low” usually means some punch or rumble exists, yet fundamentals feel thin. “Non-existent” describes notes that vanish or effects that should be felt but are missing at your seat.
Setting realistic expectations for low bass and ultra-low frequencies
Think in bands: mid-bass (50–80 Hz) gives punch; low bass (30–50 Hz) adds body; the ultra-low region (≤25 Hz) is mostly felt, not heard.
Most recorded music stays above ~30 Hz. Exceptions include pipe organ and certain electronic music that reach sub-20 Hz. A null at your listening spot can make a single frequency disappear even when the driver performs fine elsewhere.
Practical takeaway: confirm content and operation first, then address room interaction, placement, and phase before assuming hardware failure.
Quick checks before you dive into room acoustics
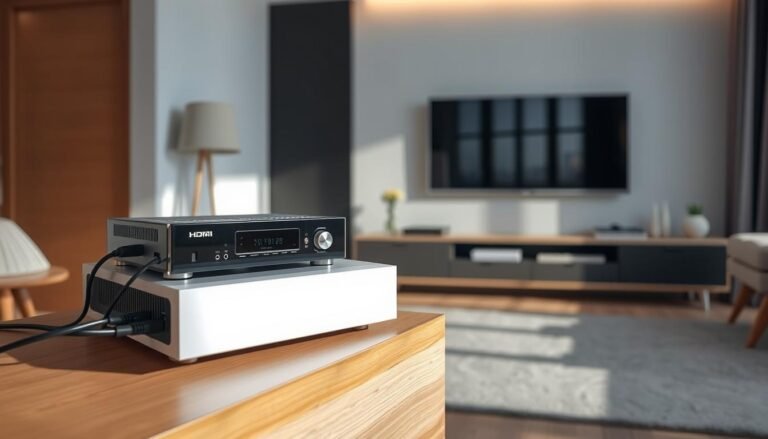
Start with a quick systems check. Confirm that the sub is powered and its status light looks normal. Make sure AVR or pre/pro Sub Out is enabled and that mains are set appropriately — for many setups set the speakers to Small when the sub handles low frequencies.
Verify cable paths next. Test RCA or XLR from the AVR to the sub input and try another input if needed. For speaker-level integration, use high-impedance speaker-level inputs so line-level signals to your speakers stay intact and you avoid altering mains output.
Check gain and trims. Ensure nothing is muted and that subwoofer gain plus AVR sub level aren’t set too low. Some units use auto-on thresholds — raise the AVR sub trim briefly to wake the amp during testing.
Run a fast functional test with full-band or filtered pink noise or a known deep track. Hearing sound from the cabinet confirms signal flow before you inspect placement or room time issues.
- Flip wires to check polarity first; a simple reversal can cancel near crossover points.
- If silence persists, swap cables and sources to isolate a bad output or cable.
- Play a trusted demo scene to rule out content that lacks deep bass.
Room acoustics and listening position: the foundation of bass response
A room acts like an instrument, and its resonances decide which frequencies survive at your seat.
Stationary waves form nodes and antinodes that change how low end lands. A node can boost a note; an antinode can cancel it completely.
If your listening position sits in a null, simple equalization cannot restore that missing energy. Moving the seat or the sub a few feet often fixes what EQ cannot.
Room dimensions, neutral decay, and when to call an acoustician
Larger rooms with high ceilings tend to spread modes and reduce severe peaks and nulls. Small rooms make modal problems worse and can mask whole notes at certain seats.
Aim for neutral decay: low-frequency decay should roughly match mid/high decay to keep notes tight and clear. If decay is uneven, bass becomes muddy and indistinct.
Lightweight walls, cavities, and energy loss
Flexible walls or hidden cavities can act like diaphragms and let low energy escape the space. Solid construction keeps energy inside but often needs targeted treatment.
- Slide your couch a foot or two and listen for big changes.
- Try multiple listening positions to find where frequency response is smooth.
- If modes are complex, consult an acoustician for modeling and treatment plans.
For practical next steps, check a concise room acoustics guide that walks through diagnosis and easy fixes.
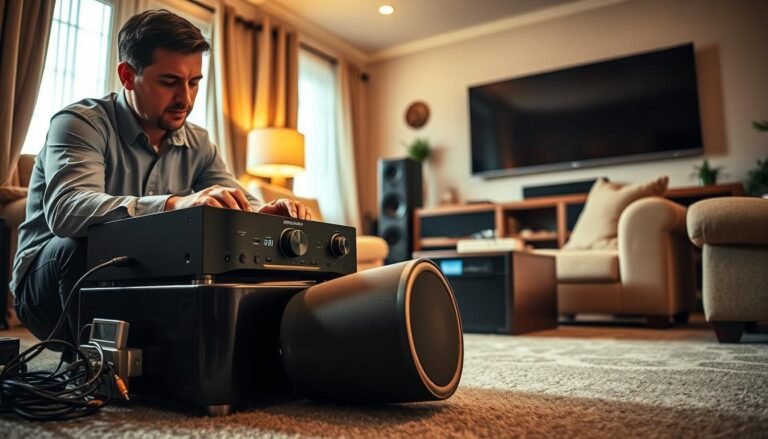
Placement that works: subwoofer crawl and practical location tips
Start the subwoofer crawl by placing the unit at your listening position. Play steady low material and walk the perimeter while listening closely. The spot that sounds most even and powerful becomes the final placement.
Corners often add output via boundary gain, but they can make modal peaks boomy. A mid-wall or nearfield placement trades raw level for smoother response at one seat. Try each to compare realism and control.

How to do the crawl for stronger low end
- Set the unit at the listening position and play a steady track.
- Crawl along walls and corners, pausing at likely points to judge evenness.
- Choose the best-sounding point and move the sub there for final testing.
Corners vs mid-wall and nearfield options
Corners boost level but may excite room modes. Mid-wall placement often gives a cleaner response at seat line.
Nearfield placement — close to your seat or the back wall — can reduce room interaction and tighten low-frequency control.
Stereo subs vs mono: smoothing room modes and envelopment
Two subs spread energy and reduce seat-to-seat variation. Stereo pairs can add envelopment, though benefits depend on content and setup.
| Placement | Benefit | Drawback | Best use |
|---|---|---|---|
| Corner | Higher output | Can be boomy | Small rooms needing more SPL |
| Mid-wall | Smoother seat response | Less raw level | Critical listening |
| Nearfield | Tighter, consistent delivery | Limited room coverage | Single-seat setups |
| Dual subs | Smoother across seats | More setup effort | Multi-listener rooms |
Dialing in crossover, phase, and gain by ear for smooth frequency response
Fine-tuning crossover, phase, and gain by ear turns a messy handoff into a seamless low-end blend. Start with a clear signal and patient listening. Use a focused tone, then verify with music.
Using filtered pink noise to “focus” crossover and gain
Play filtered pink noise centered near your intended crossover. Adjust the low-pass so adding the sub does not shift the dominant perceived frequency upward. That keeps the handoff neutral and avoids a honky mid-bass.
Correct polarity first, then adjust phase to align time
Begin with correct polarity. If a reversed setting sounds louder and more solid around the crossover, choose that. Next, tweak phase until the pitch starts to rise, then back off slightly to align time without creating peaks.
Verifying even bass notes with musical references
Set gain like focusing a camera: raise until pitch sharpens, lower until it flattens, then settle mid-point where the perceived note matches mains-only. Validate with a track that has known fundamentals, such as Rebecca Pidgeon’s demo lines. Iterate small changes—frequency, phase, then gain—and recheck until transitions feel smooth and natural.
Polarity is not phase: fix wiring and time alignment the right way
A simple wire swap can cure a polarity fault, while phase needs proper delay tools to align sound in time.
Polarity refers to driver direction on a positive electrical pulse. Swap speaker wires and the cone will move outward instead of inward. That action fixes absolute polarity instantly.
Phase describes relative time alignment between a sub and mains. Use delay or phase controls to shift arrival time so notes sum at the listening point.
Polarity reversal vs phase (time delay) at crossover
- Polarity affects cone motion and is corrected by reversing wires at the speaker or line output.
- Phase needs millisecond delay adjustments to align arrival time across frequencies.
- Confusing them causes cancellations at the crossover frequency, creating holes where reinforcement should occur.
Common crossover slopes and polarity implications
Many 12 dB and 24 dB low-pass slopes change the required polarity relationship to mains for clean summation. If a reversal sounds fuller at the crossover, keep that wiring and then fine-tune phase.
Pro tip: console “phase” buttons often flip polarity, not timing. Always set polarity first, then use true phase or delay controls to perfect alignment. This sequence prevents broad-band cancellations and hollow low-end.
Sealed vs ported subs: choosing the right kind of subwoofer for your room
Enclosure type strongly affects extension, transient behavior, and room interaction. Pick a cabinet that fits room size and listening habits to get reliable low-frequency results.
Sealed designs
Sealed boxes are compact and offer a smooth roll-off and tight control. They often deliver a flat frequency response in-room and suit music-first listeners in small rooms.
Expect less deep output at high levels; sealed units can bottom out sooner during heavy scenes.
Ported designs
Ported enclosures use a tuned vent to boost output near tuning. That yields more deep bass and greater efficiency for movie fans or large rooms.
Variable tuning—opening one port versus two—lets you trade extension for headroom and lower port turbulence.
Managing port chuffing and room gain
If you hear wind-like noise at high levels near tuning, that is port chuffing. Using more ports or reducing level in that band helps.
Small rooms often add room gain, extending in-room response. In those spaces, running ports open can tame ultra-low buildup while increasing usable headroom.
| Enclosure | Typical benefit | Typical drawback | Best for |
|---|---|---|---|
| Sealed | Tight, linear low end | Less deep output | Music-first, small rooms |
| Ported | More deep output near tuning | Can chuff at high levels | Movies, larger rooms |
| Variable-tuned port | Flexible extension and headroom | Requires tuning to room | Mixed use, adjustable setups |
Choose a good subwoofer that balances size, desired extension, and listening style. Movie-first setups in medium or large rooms often lean ported, while sealed units suit critical music listening in tight spaces.
Output, power, and driver size: getting enough clean bass without distortion
A sub’s real-world performance ties to measured clean output, sustained power, and the physical air movement a driver provides.

CEA/CTA-2010 and what clean output means
CTA-2010 reports max peak output across 1/3-octave bands at set distortion limits, usually from about 10–125 Hz. It gives a practical proxy for how loud a unit stays before distortion becomes noticeable.
Clean output means delivering low-frequency energy under audible distortion thresholds so notes remain tight and defined instead of harsh or smeared.
RMS vs peak, enclosure efficiency, and driver diameter
RMS power defines continuous drive; peak power shows short bursts. Both matter, but sustained RMS plus enclosure efficiency determine usable output over time.
Larger drivers move more air per excursion, giving greater low-frequency weight. Ported designs often yield more output per watt near tuning, while sealed boxes trade extension for control.
Pressurizing larger or open rooms
Open-concept living spaces let energy radiate into adjacent areas, reducing perceived impact at a single seat. To pressurize such spaces you may need bigger drivers, higher overall power, or multiple subs.
- Practical rule: use CTA-2010 numbers to compare models, not as absolute promises.
- If headroom runs out, upgrade driver size, add a second unit, or pick a more efficient enclosure.
| Factor | What it affects | Practical sign | Recommended fix |
|---|---|---|---|
| CTA-2010 rating | Clean max SPL vs distortion | Sharp clipping or muddy notes at high levels | Choose higher-rated model or add another unit |
| RMS vs peak | Sustained output vs short hits | Fatigue or thermal limiting on long content | Prioritize higher RMS for movies/music marathons |
| Driver diameter | Air displacement and low-frequency weight | Thin output despite rated watts | Move to larger driver or dual subs |
| Enclosure type | Efficiency near tuning / transient control | Port chuffing or quick roll-off | Select ported for level, sealed for tight control |
Content matters: music, movies, and how low your system needs to go
Your listening library determines system priorities: extension, evenness, or sheer headroom. Match capability to content before chasing deeper notes.
Mid-bass, low bass, and ultra-low bands
Think in simple bands: mid-bass (50–80 Hz) gives impact, low bass (30–50 Hz) adds warmth, and ultra-low (≤25 Hz) is mostly tactile. Most music stays above ~30 Hz, so evenness and control in mid/low bands often matter more than extreme extension.
Electronic music, pipe organ, and sub-20 Hz exceptions
Certain electronic music and pipe organ repertoire can dip under 20 Hz. If that content dominates your playlist, plan for more displacement or multiple units to deliver tactile energy without distortion.
Choosing demo tracks and test tones
- Use consistent demo songs that step through fundamentals and octaves to reveal missing notes.
- Run swept tones and filtered pink noise to map peaks and nulls across frequencies.
- Match system choice to measured octave distribution in your library, not to perceived marketing claims.
Why is the bass from my subwoofer too low or non-existent?
Start by treating the room and seat as part of the system, not just the hardware. Small shifts in position often turn a hollow spot into clean, full response.
Most common culprits
- Poor sub placement — corners, walls, and mid-wall spots change how energy builds.
- Listening seat in a null — a node can cancel a fundamental so people hear nothing at one spot.
- Polarity or phase mismatch at the crossover — that cancels output right where the mains and sub should sum.
- Content lacking low energy — some tracks and mixes simply don’t include deep notes.
Less common causes
Unintended filters or high-pass settings in the chain can remove low bands. Incorrect wiring or a faulty amp/driver also happens but is rarer.
| Cause | Symptom | Quick test | Fix |
|---|---|---|---|
| Placement | Uneven level across room | Sub crawl | Move sub to best crawl point |
| Seat null | Note missing at seat | Listen from other spots | Shift seat a few feet |
| Polarity/phase | Hollow handoff | Reverse polarity, adjust phase | Align phase after polarity |
| Hardware/filters | Complete silence or roll-off | Swap cables/sources | Correct filter settings or repair unit |
Practical note: most people fix issues with a quick crawl, a couple of demo tracks, and small phase/gain tweaks. Over years those methods catch the vast majority of faults.
Advanced fixes: phase cancellation, EQ, and integration with mains
Clean integration needs careful listening, small adjustments, and restraint. Start by confirming placement and polarity, then move to timing and gentle equalization. Proper work here improves overall frequency response without adding audible artifacts.
Identifying cancellations near the crossover and adjusting phase/time
Use ear-led checks for weak notes at the crossover point. Play a steady tone or filtered pink noise and sweep through the handoff.
- If a specific note is thin, suspect timing misalignment; nudge phase or add a few milliseconds of delay.
- Make small changes and listen between steps; large jumps hide subtle improvements.
When to use gentle EQ after placement is optimized
Only apply EQ after position and phase feel right. Room modes often resist equalization and can increase distortion when overboosted.
- Prefer narrow cuts to tame peaks rather than broad boosts.
- Limit boosts; small, data-driven tweaks keep distortion low and preserve transient detail.
Integrating satellites: avoiding comb filtering and surface reflections
Reflections from nearby consoles, walls, or surfaces create comb filtering that degrades low-end clarity. Keep direct paths clear and follow a long indirect-path rule for reflections.
- Increase direct-to-reflected energy by removing close obstacles.
- Recheck integration with filtered pink noise and several tracks so tuning works across content and various frequencies.
| Fix | When to use | Benefit |
|---|---|---|
| Phase/Delay tweak | Weak notes near crossover | Restores summation at listening point |
| Gentle EQ | After placement/phase | Smooths narrow peaks, avoids added distortion |
| Reflection control | Comb filtering signs | Improves clarity and direct bass impact |
When to add a second subwoofer and how to place it
Adding a second active cabinet helps turn a setup that favours one seat into a system that serves a whole group. Multiple drivers average room modes, so peaks and nulls smooth out across a listening area.
Multi-sub benefits for smoothing bass across seats
Two units reduce seat-to-seat variation and improve uniformity. That makes tonal balance more predictable for families or groups, not just a single listener.
- Common layouts: front wall midpoint plus opposing mid-wall, or diagonal corners to cancel strong modes.
- Open-plan spaces gain headroom and tactile impact when output spreads between two cabinets.
- Level-match each unit, then align phase/time to mains and one another for clean summation.
| Layout | Benefit | Best for |
|---|---|---|
| Front + opposing mid-wall | Balances front-to-back modes | Traditional living rooms |
| Diagonal corners | Reduces strong corner peaks | Small to medium rooms |
| Front wall midpoint pair | Smooths left-right variation | Stereo systems and media rooms |
Integration tip: run another crawl after placement. Small level and phase tweaks unlock the full ability of dual units to create a consistent listening room.
Recognizing and preventing distortion while chasing deep bass
Seeking more weight at the bottom end can push drivers and amplifiers past safe limits. Know how harmonic distortion and bottoming out sound so you stop damage before it starts.
Harmonic distortion shows as harsh overtones or fuzz on sustained notes. Bottoming out happens when excursion limits are exceeded and the cone reaches mechanical stops.
- Audible crackling, fluttering, or mechanical thumps means the driver is stressed and needs less level or more headroom.
- Ported boxes that make wind-like noise at high output show turbulence; reduce the amount in that band or change port tuning.
- Keep gain staging conservative so the sub adds smoothly at the crossover and does not overpower mains.
- Persistent distortion at normal levels signals a need for more capable hardware, extra cabinets, or improved placement for efficiency.
| Problem | Quick fix | When to upgrade |
|---|---|---|
| Harmonic distortion | Lower level, check EQ | After conservative staging fails |
| Bottoming out | Reduce input or add headroom | Stronger amp / larger driver |
| Port chuffing | Limit energy near tuning | Change port config |
Pro tip: more displacement and efficiency deliver safe, clean deep impact far better than simply cranking the final-stage power.
Conclusion
A simple, ear-led routine can reveal whether setup, room, or content limits a system’s low end. Do quick checks first, then focus on small moves. Over years, tiny placement and phase tweaks often yield bigger gains than swapping gear.
Fix fundamentals at your listening position and use filtered pink noise plus musical references to set crossover, phase, and gain. Confirm a smooth frequency handoff and aim for neutral bass response. Match enclosure type and size to room needs, and use CTA-2010 numbers for realistic expectations.
If one cabinet cannot deliver, try multiple placements to add headroom and even coverage. For related gear notes, see this AV receiver comparison to help pair electronics with your subwoofer and system.