Tangled cords around a TV distract from the screen and make troubleshooting a chore. This brief guide shows practical, budget-friendly ways to tidy a typical setup so your living room or home looks intentional.
You’ll learn two clear paths: quick, non-invasive concealment using raceways, Velcro ties, and furniture routing, or full in-wall routing for a true floating-TV look. Both options work for a simple theater or a full home theater system.
Safety matters: power cords are different from low-voltage cables. Follow code and avoid stuffing standard power leads behind walls.
Expect a neater room, fewer unplugging mishaps, and easier upgrades. With small tools and labels you can turn a messy entertainment corner into a showroom finish.
Key takeaways: clear problem definition, two concealment paths, safety and code reminder, payoff: cleaner look and easier maintenance.
Plan your cable-hiding approach for a cleaner home theater room
Begin with a clear plan that matches your space and how you use your equipment. A little prep prevents a lot of rework and keeps your room functional.
Identify what needs covering
List every connection: HDMI, power cords, speaker runs, and network lines. Count inputs and note which pieces sit together so you know where congestion will form.
Pick renter-friendly or in-wall options
Renters often use paintable raceways and furniture-edge routing. Homeowners can consider in-wall plates for a floating-TV look, but check studs and pipes first.
Map equipment and outlets
Sketch the TV, receiver, speakers, media console, and outlets. Keep signal cables away from power lines to reduce interference and make future swaps easier.
- Inventory every connection so no line is forgotten.
- Choose solutions based on access and maintenance needs.
- Plan paths that minimize cable length and avoid awkward crossings.
Tools and materials that make cable management faster and cleaner
A small set of quality tools turns a messy project into a fast, neat job. Gather basics before you cut into a wall so work runs smoothly and damage is minimal.

Essential gear and why it matters
Non-negotiable tools: a stud finder to avoid studs, pipes, and live wiring; a drywall saw or sharp utility knife for neat openings; and a drill to mount plates and anchors.
Pick a paddle bit or hole saw sized to your recessed plates. Matching bit to plate means cleaner holes and less patch and paint work later.
Time-saving accessories
Fish tape is the real frustration-saver. It snakes through cavities and insulation so you can pull HDMI and speaker cables without tearing up drywall.
- Recessed cable plates create a professional pass-through behind the TV and near the console.
- Paintable raceways offer a surface option when in-wall runs aren’t possible.
- Use in-wall rated cables labeled CL2 or CL3 for any inside-wall cable runs.
| Tool | Typical cost | Use |
|---|---|---|
| Stud finder | $20–$50 | Locate studs, pipes, wiring |
| Drill + hole saw | $60–$170 | Cut clean holes for plates |
| Fish tape | $15–$30 | Pull cables through cavities |
Many DIY in-wall kits bundle plates and a hole saw, saving time and guesswork while improving the final finish.
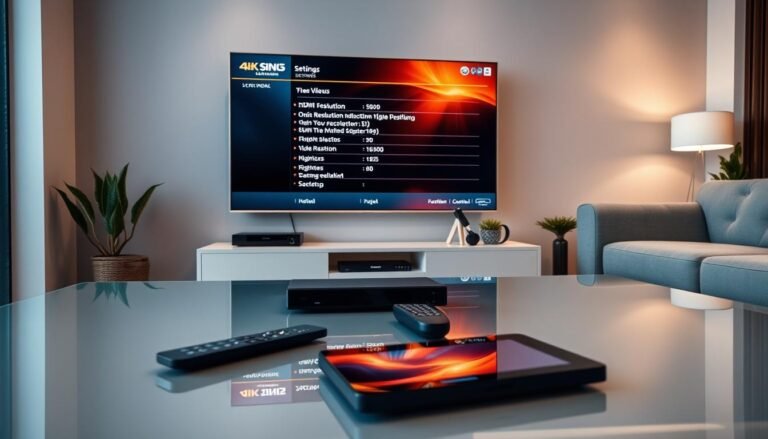
How do I hide the wires for my HDMI receiver setup?
Start with a single tidy step so your gear stays organized and simple to access.
First-hour workflow: unplug devices, sort items into power and low-voltage piles, then rebuild one deliberate bundle. This prevents the old mess from returning when you slide the console back.
Separate signal from electrical
Run power cords on one side of the cabinet and low-voltage cable runs—HDMI, speaker, Ethernet—on the other. This reduces interference and makes tracing faster when you need to troubleshoot.
Bundle, secure, and label
Use reusable Velcro cable ties to group related cables behind furniture. They are cheap, adjustable, and reopen when you add devices.
Label both ends of each cable so the TV end and receiver end match. Printable tags or stickers that come with some Denon and Yamaha receivers save time.
Cable length and appearance
Replace extra-long runs with shorter HDMI and power cords to avoid loops and improve airflow behind gear.
When any portion runs along trim or a mount, lighter-colored or white cables blend better against off-white walls and improve the overall look.
| Action | Why it matters | Quick tip |
|---|---|---|
| Separate power vs signal | Reduces interference and simplifies tracing | Run each on opposite sides of the console |
| Use Velcro ties | Reusable and adjustable for future changes | Avoid one-use zip ties |
| Label both ends | Speeds troubleshooting and device swaps | Match TV and receiver port numbers |
For an expanded workflow and in-wall options, see our home theater setup guide.
Surface-mounted ways to hide HDMI and power cables without opening walls

If cutting drywall isn’t possible, surface channels and fabric covers are practical options. They work well for renters, brick or concrete walls, and any spot where fast access matters.
Use a paintable raceway for a clean, intentional finish
Pick a sturdy PVC channel that can be cut to length. Lightly sand or wipe before painting so the finish matches your wall color.
Size up to avoid bulging
Choose a wider raceway when you run multiple cables together. A larger channel prevents seam bulging and closes neatly with HDMI, Ethernet, and low-voltage control lines inside.
Smart routing keeps runs out of sight
Route cables along furniture edges, behind baseboards, and on natural boundaries so your eye does not follow the path. This keeps the room tidy and reduces visible clutter.
Decorative alternatives for exposed spans
When a run crosses open space, a fabric cord cover can look more like décor than hardware. These covers now make up a noticeable share of cord-management sales and blend better in living areas.
Serviceability matters: surface-mounted paths make it fast to swap cables or upgrade gear without re-fishing lines through a wall cavity.
| Solution | Best when | Pros | Cons |
|---|---|---|---|
| Paintable PVC raceway | Renter, concrete, fast access | Blends with wall, sturdy, paintable finish | Requires cutting and mounting |
| Wide channel raceway | Multiple cables in one run | Prevents bulging, easier to close | More visible depth |
| Fabric cord cover | Exposed spans across room | Decorative look, flexible, easy install | Less rigid protection than PVC |
| Furniture-edge routing | Behind consoles or along baseboards | Minimal hardware, discreet | Depends on furniture placement |
In-wall cable routing for a “floating TV” look with a receiver-based system
A true showroom finish starts by knowing what’s behind your walls before any cuts.
First, identify wall construction: drywall over wood studs, plaster and lath, or metal studs. Each type changes how you cut, anchor plates, and fish cable runs.
Read your walls first
Use a stud finder and probe gently. Plaster needs a different saw; metal studs require self-tapping anchors.
Avoid hidden obstacles
Never cut directly above or below outlets or switches. Vertical wiring often runs there, and fire blocking can stop fish tape mid-run.
Place entry and exit holes
For a receiver-based system, make a top hole behind the TV and a bottom hole behind the media cabinet. This two-hole method lets cables drop naturally to the receiver.
Cut and fish with care
Trace the recessed plate outline and cut slowly with a drywall saw for clean holes. Feed fish tape through the cavity, attach hdmi, speaker, and other low-voltage cables, and pull gently—watch for insulation snags.
Finish for a showroom look
Install recessed plates, keep visible cable portions short, and leave enough slack behind the receiver for service. Proper plates and tidy entry points create a professional finish quickly.
| Task | Why it matters | Quick guideline |
|---|---|---|
| Identify wall type | Tool choice and cutting method differ | Drywall = drywall saw; plaster = plunge saw; metal studs = anchors |
| Avoid outlet zones | Prevents hitting live wiring | Do not cut above/below switches or outlets |
| Two-hole placement | Streamlines cable routing to receiver | Top hole behind TV, bottom behind cabinet |
| Fish cables | Moves hdmi and speaker lines through cavities | Use fish tape; secure and pull slowly |
| Install recessed plates | Creates clean, serviceable pass-throughs | Trace plate, cut clean holes, mount plate flush |
Handle power safely and keep connections code-compliant
Never run a standard TV power cord inside a wall. That cord is not rated for in-wall installation and doing so can violate electrical code and raise a real fire risk.
Why a regular power cord is unsafe
Standard AC leads are designed for exposed use, not hidden cavities. Placing them behind drywall can trap heat and damage insulation. This creates a hazard and often breaks local code.
What an in-wall power kit does
An in-wall power kit installs a recessed outlet behind the TV and routes power through a code-compliant path. These kits let the TV plug in without a dangling cord and have grown in adoption by about 25% as homeowners seek safer finishes.
Separation and placement best practices
Keep power cables away from low-voltage signal runs. Separate AC lines from HDMI, speaker, and Ethernet to reduce electromagnetic interference that can cause noise or dropouts.
- Plan outlets so the recessed plug sits directly behind the mount and is accessible without pinching a plug.
- Use properly rated, in-wall components and follow kit instructions, especially near existing outlets and studs.
- Before closing plates, perform a final connection check: confirm the TV powers on, sources handshake over HDMI, and the receiver shows stable inputs.
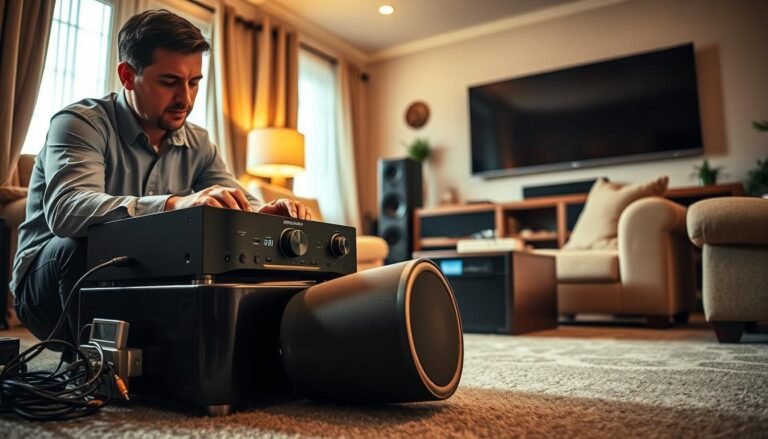
Hide receiver and speaker wires across the room without tripping hazards
Protect family and gear by routing speaker cables along natural edges, then fastening them with inexpensive clips.
Start at the receiver and follow baseboards. Use nail-in cable clips at consistent spacing so lines stay tight to trim and out of sight. This method keeps runs neat and reduces snag points.
Manage doorway transitions and open spans
Wrap cables along door frames, tucking the run into the corner where the frame meets the trim. For short open crossings, run speaker wires in low-traffic areas and place them under the edge of a rug.
Protect and lift cords from floors
Do not run power cords beneath rugs. Instead, mount a power strip to the back or side of your media console using the strip’s rear slots and a couple screws. This lifts cords off the floor and frees space for slack.
Keep media devices usable yet hidden
Stash media boxes inside closed furniture and add an inexpensive infrared receiver so remotes still work. Drill ventilation holes or use existing vents to prevent heat buildup during long movie sessions.
- Routing guidance: follow baseboards, use clips every 12–18 inches.
- Doorways: secure at corners to avoid exposed spans.
- No-wall fallback: rubber floor raceways protect cables along low-traffic paths.
Conclusion
Wrap up with a few decisive moves to keep the entertainment area tidy long-term. Choose in-wall when permanence and a clean finish matter, or surface raceways when access and renter options win. Match the option to your equipment and how often you change the room.
Safety first: keep power separate from low-voltage runs and use a code-compliant in-wall power kit when routing through walls. That protects audio performance and reduces risk at outlets.
Quick wins: shorten excess cables, bundle with Velcro, label both ends, and mount a power strip off the floor. Before closing plates, make sure video handshakes, audio channels, and network connections all work.
Leave service loops, mark connections clearly, and recheck periodically so your home theater system stays neat and ready for the next upgrade.
FAQ
What are quick renter-friendly ways to conceal cables along walls and furniture?
Use paintable surface-mounted raceways and adhesive-backed cord channels that snap shut. Route cords along baseboards, behind TV stands, or under crown molding. Velcro cable ties and cable sleeves keep multiple leads neat. These options avoid cutting drywall and work well with living-room furniture and entertainment centers.
Which tools and materials do I need to run cables through a wall safely?
Essential tools include a stud finder, drywall saw or utility knife, power drill with a paddle bit, and fish tape. Use recessed cable plates, in-wall rated HDMI and speaker wire labeled CL2 or CL3, and an in-wall power kit if adding an outlet. Safety labels and proper plates give a finished look while meeting code.
How can I reduce interference between signal and power lines?
Keep low-voltage signal cables like HDMI and speaker wires separated from AC power runs by several inches or route them in separate cavities. Use shielded HDMI cables and avoid running signal cables parallel to electrical wiring for long distances. Bundling similar cables together and using ferrite cores can also help.
Is it safe to put a TV power cord inside the wall?
No. Standard power cords aren’t rated for in-wall use. Install a proper in-wall power kit or have a licensed electrician add a recessed outlet behind the TV to meet electrical code and prevent fire hazards.
How do I create a floating TV look with in-wall cable routing?
Locate studs and obstacles, cut clean entry and exit holes behind the display and media cabinet, then fish in in-wall rated HDMI and speaker wires. Finish both ends with recessed cable plates or wall grommets. Add a recessed outlet for power to complete the floating effect.
What’s the best way to hide an AV receiver and media boxes in a room?
Store gear inside ventilated cabinetry or a media credenza. Use IR repeaters or a wireless remote extender to control equipment from the seating area. Mount a surge protector or power strip to the furniture back to keep cords off the floor and pass cables neatly through drilled holes or grommets.
How do I run surround speaker cables across the room without tripping hazards?
Run speaker wire along baseboards or door frames using nail-in cable clips, or tuck them under carpet edges and rugs in low-traffic zones. You can also use flat speaker wire designed for concealing under trim, or route cables inside walls if studs allow.
When should I call a professional for in-wall cable installation?
Hire a licensed electrician or pro installer if you need an in-wall power outlet, have plaster or metal stud walls, or suspect fire blocking and complex wiring runs. Professionals ensure code compliance, safe placement near studs and pipes, and a clean finished look.
Are there labeling or organization tips to speed future changes and troubleshooting?
Label both ends of every cable with a durable tag or printed label detailing function and destination. Color-code ties or sleeves by device type, keep a simple diagram of runs, and store spare short cables accessible behind the media cabinet to simplify swaps.
What cable types and ratings should I use inside walls?
Use cables marked CL2, CL3, or in-wall rated HDMI and speaker wire. These meet fire-safety standards for in-wall installation. For power, only use approved in-wall power kits and outlets; never run a standard power cord inside a wall cavity.