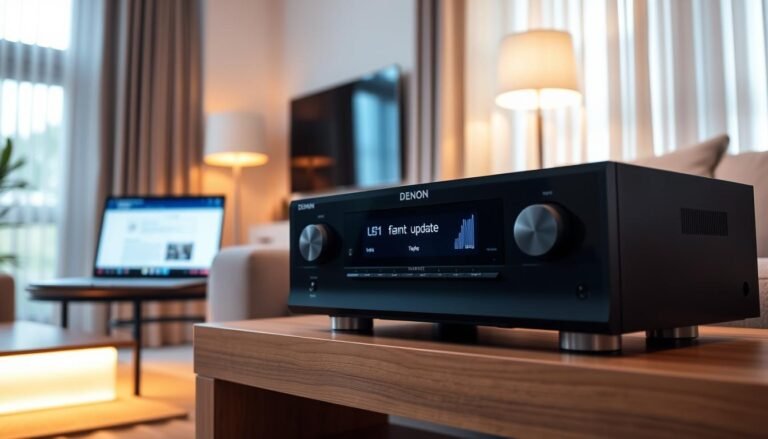
Few things disrupt a movie night faster than an audio system that refuses to respond to your commands. When your home theater setup stops reacting, it often feels like a major technical failure.
However, most connectivity glitches are simple to fix without calling a professional. This guide offers a clear path for Troubleshooting Yamaha Receiver Remote connectivity problems to restore your audio experience.
If you find your Yamaha remote not working, do not panic. Many users encounter this issue due to minor signal interference or depleted batteries.
We will walk you through the necessary steps to identify why your device feels Yamaha remote unresponsive. By following these systematic checks, you can regain full control over your settings and enjoy your favorite media once again.
Initial Checks for Troubleshooting Yamaha Receiver Remote Functionality
You can resolve many common Yamaha AV receiver remote control issues by performing a quick inspection. Before you consider complex repairs or replacements, it is vital to rule out simple user errors that often mimic hardware failure. These Yamaha remote troubleshooting tips provide a solid foundation for restoring your home theater experience.

Verifying the Receiver Power Status
The first step in your diagnostic process is confirming the Yamaha remote power status. Ensure your receiver is plugged into a live wall outlet and that the main power switch is toggled to the “on” position. If the unit is stuck in a standby or error mode, it may ignore incoming infrared signals entirely.
Check the front panel display for any blinking lights or error codes. If the receiver is unresponsive to the physical power button on the device itself, the issue likely lies with the power supply rather than the remote control.
Checking for Stuck Buttons on the Remote
A Yamaha remote button stuck can prevent the device from sending commands to your receiver. Even a slightly depressed button can cause the remote to remain in a constant transmission state, which drains battery life and blocks other signals. Carefully inspect each button to ensure they all spring back freely after being pressed.
If you notice any debris or sticky residue around the buttons, gently clean the area with a soft, dry cloth. Keeping the remote clean is a simple way to prevent the Yamaha remote not working due to physical interference.
Testing the Remote with a Smartphone Camera
You can perform a Yamaha remote infrared test using the camera on your smartphone. Since the human eye cannot see infrared light, your phone’s digital sensor acts as a bridge to visualize the signal. Point the top of the remote directly at your phone’s camera lens while pressing any button.
If the remote is functioning correctly, you will see a faint, flickering purple or white light on your phone screen. If no light appears, the remote is likely failing to emit a signal, indicating that the issue is internal to the handheld unit.
Battery and Power Supply Verification
Power issues are the most common reason for a Yamaha remote unresponsive to commands. Often, the solution is as simple as ensuring the power source is functioning correctly and providing consistent voltage to the device.
Proper Battery Orientation and Contact Cleaning
Check that your batteries are inserted according to the polarity markings inside the compartment. Even a slightly misaligned cell can prevent the remote from sending a signal to your receiver.
If the remote still fails to operate, inspect the metal contact springs for debris or oxidation. You can gently wipe these contacts with a dry, lint-free cloth to ensure a solid electrical connection.
Replacing Old Batteries with Fresh Alkaline Cells
When performing a Yamaha remote battery replacement, always choose high-quality alkaline cells. Cheap or generic batteries may not provide the stable voltage required for the infrared transmitter to function reliably.
Avoid mixing old and new batteries, as this can lead to uneven power distribution. Using a fresh, matching set ensures that your remote maintains a strong signal over long distances.
Identifying Battery Leakage and Corrosion Damage
If you notice a white, powdery substance on the battery terminals, you are likely dealing with leakage. This requires careful Yamaha remote corrosion cleaning to restore functionality.
Use a cotton swab lightly dampened with white vinegar or lemon juice to neutralize the alkaline residue. Once the area is clean and dry, the remote should regain its ability to communicate with your receiver.
| Maintenance Task | Frequency | Benefit |
|---|---|---|
| Battery Check | Monthly | Prevents sudden failure |
| Contact Cleaning | As needed | Ensures steady voltage |
| Full Replacement | Every 6 months | Maintains peak signal |
Signal Interference and Line of Sight Obstructions
Infrared signals rely on a clear path, yet many home setups inadvertently block this connection. When you experience Yamaha AV receiver remote control issues, the problem often stems from the physical environment rather than a hardware failure. Understanding how external factors influence your device is the first step toward a reliable home theater experience.

Clearing Obstacles Between the Remote and Receiver
The infrared sensor on your receiver requires an unobstructed view to receive commands. Even small decorative items, such as picture frames or plants, can disrupt the Yamaha remote line of sight. Ensure that the front panel of your receiver remains free from clutter to maintain a strong signal.
If you have placed your receiver inside a closed cabinet, the signal may struggle to reach the sensor. Consider using a glass-front cabinet or an infrared repeater system if you prefer to keep your equipment hidden. Clear visibility is essential for consistent performance.
Minimizing Interference from LED and Fluorescent Lighting
Modern lighting solutions often emit frequencies that conflict with infrared technology. You might encounter Yamaha remote LED interference if your receiver is positioned too close to high-efficiency bulbs or dimmable light fixtures. These lights can create a “noise” that drowns out the signal from your remote.
To reduce Yamaha remote signal interference, try turning off nearby lamps or dimmers while testing the remote. If the remote functions correctly with the lights off, you have identified the source of the problem. Relocating the receiver away from direct light sources is a simple way to resolve this conflict.
Adjusting the Remote Angle and Distance
Sometimes, the solution is as simple as changing your physical position. If you are facing Yamaha remote distance issues, try moving closer to the receiver to see if the signal improves. Infrared remotes have a limited range and a specific “cone” of operation that requires you to point the device directly at the sensor.
Avoid using the remote from extreme side angles, as this often weakens the signal strength. If the remote works only when you are standing directly in front of the unit, you may need to adjust the receiver’s placement on your shelf. The following table outlines common environmental factors and their potential impact on your system.
| Environmental Factor | Potential Impact | Recommended Action |
|---|---|---|
| Physical Obstructions | Blocks infrared beam | Clear the path |
| LED/Fluorescent Lights | Creates signal noise | Relocate receiver |
| Extreme Distance | Weakens signal strength | Move closer to unit |
| Off-Axis Angle | Reduces sensor sensitivity | Align remote directly |
Resetting and Re-pairing the Remote Control
When basic troubleshooting fails, you may need to perform a software-level intervention to fix Yamaha receiver remote communication errors. These advanced steps help clear corrupted memory or settings that prevent the device from sending the correct infrared codes. By following these procedures, you can often restore factory-level performance to your Yamaha home theater system.
Performing a Hard Reset on the Remote
A Yamaha remote reset procedure is the most effective way to clear internal glitches. Start by removing the batteries from the remote control entirely. Press and hold every button on the remote for at least 30 seconds to discharge any remaining electrical energy.
After this period, reinsert fresh, high-quality alkaline batteries. This process forces the remote to reboot its internal processor, which often resolves persistent unresponsiveness.
Re-syncing the Remote to the Yamaha Receiver
If the remote still fails to communicate, you should follow a proper Yamaha remote pairing guide. Ensure the receiver is turned on and in a mode that accepts remote signals. Consult your specific model’s manual to find the exact Yamaha remote sync instructions, as these can vary between different series.
Typically, this involves holding a specific combination of buttons on the remote while pointing it directly at the receiver’s sensor. Consistency is key during this process to ensure the handshake between the two devices is successful.
Updating Receiver Firmware to Improve Remote Compatibility
Sometimes, the issue lies within the receiver itself rather than the remote. A Yamaha receiver firmware update can resolve underlying compatibility issues between the remote and the receiver’s internal software. Check the official support website to see if a newer version of the system software is available for your specific unit.
Updating the firmware ensures that your receiver can correctly interpret the signals sent by your remote. Always follow the manufacturer’s instructions carefully during an update to avoid interrupting the process, which could damage the receiver’s operating system.
Conclusion
Mastering your home audio setup requires a blend of patience and technical awareness. Applying these Yamaha remote troubleshooting tips empowers you to maintain your equipment without outside help. You gain full command over your media environment by following these logical diagnostic steps.
Avoiding expensive Yamaha receiver remote repair costs starts with proactive care. Simple habits like checking battery health and keeping the signal path clear prevent most common malfunctions. These small actions extend the lifespan of your hardware significantly.
Your home theater system deserves reliable performance every time you press a button. Use these insights to keep your Yamaha gear running smoothly for years. Share your own experiences with these fixes in the space below to help other users in the community.
FAQ
Why is my Yamaha remote unresponsive even after changing the batteries?
If your Yamaha remote is still not working, ensure you have installed fresh Duracell or Energizer alkaline cells and verified they are in the correct orientation. Often, a Yamaha remote unresponsive state is caused by battery leakage or corrosion on the internal metal contacts. Use a cotton swab with a small amount of white vinegar or isopropyl alcohol to perform a Yamaha remote corrosion cleaning, ensuring a stable electrical connection.
How can I visually confirm if my remote is sending an infrared signal?
You can perform a Yamaha remote infrared test using a smartphone camera, such as one on a Samsung Galaxy or Apple iPhone. Open the camera app and point the remote’s emitter at the lens while pressing any button. If the remote is functioning correctly, you will see a flashing light on your phone’s screen, which helps determine if the Yamaha AV receiver remote control issues are hardware-related.
What should I do if a Yamaha remote button is stuck?
A Yamaha remote button stuck in the “down” position can flood the receiver with a continuous signal, preventing other commands from being recognized. Gently massage the button to release it or use a can of compressed air to clear any debris lodged in the casing. This is a critical step in troubleshooting Yamaha receiver remote functionality before considering a full replacement.
Can lighting in my room cause Yamaha remote distance issues?
Yes, environmental factors like LED interference or bright fluorescent lighting can “wash out” the infrared signal. If you are experiencing Yamaha remote distance issues, try dimming the lights or moving closer to the Yamaha RX-V or Aventage receiver. Also, ensure there is a clear line of sight, as physical obstacles between the remote and the receiver’s front panel sensor are a common cause of signal failure.
How do I re-establish a connection between my remote and the receiver?
To fix communication errors, you should follow the Yamaha remote sync instructions found in your specific model’s manual. This often involves a Yamaha remote reset procedure to clear corrupted settings. If the remote remains disconnected, check for a Yamaha receiver firmware update via the MusicCast Controller app, as updated software can significantly improve remote compatibility and system stability.
When should I seek professional Yamaha receiver remote repair services?
If you have completed the Yamaha remote troubleshooting tips—including battery replacement, infrared testing, and a hard reset—and the device still fails to operate, there may be internal circuit damage. In such cases, seeking professional Yamaha receiver remote repair or purchasing a genuine Yamaha replacement remote is the best course of action to regain control over your home theater equipment.